Apple Mail: POP
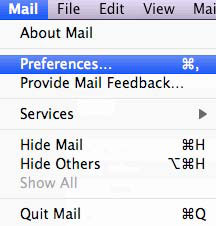
Step 1From the Mail menu, select Preferences. |
 |
Step 2Go to the Accounts tab |
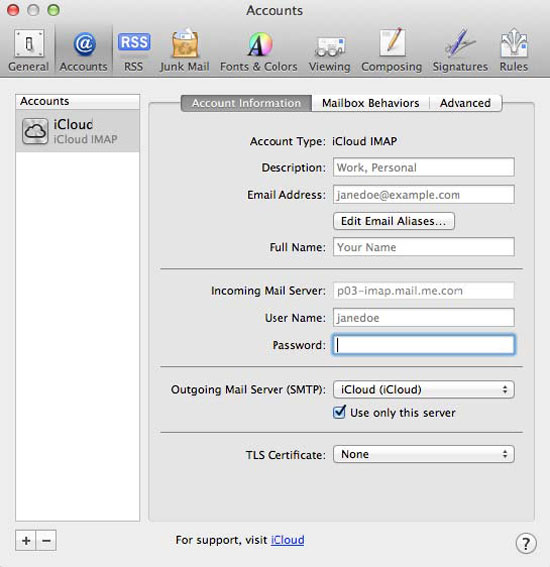 |
Step 3Click the plus sign(+) at the bottom of the Accounts box to add a new one. |
|
Step 4In the Add Account window:
|
 |
Step 5Click Continue. |
|
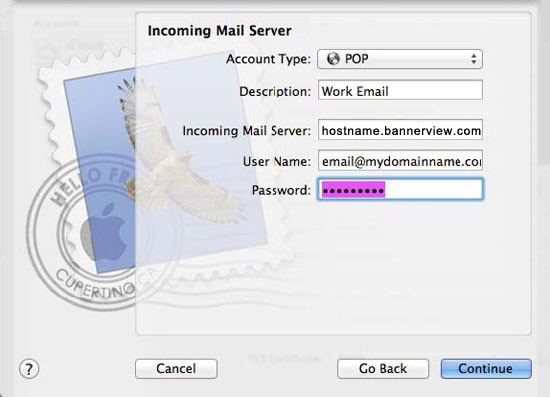
Step 6On the Incoming Mail Server screen, complete the fields as follows:
|
 |
Step 7Click Continue. |
|
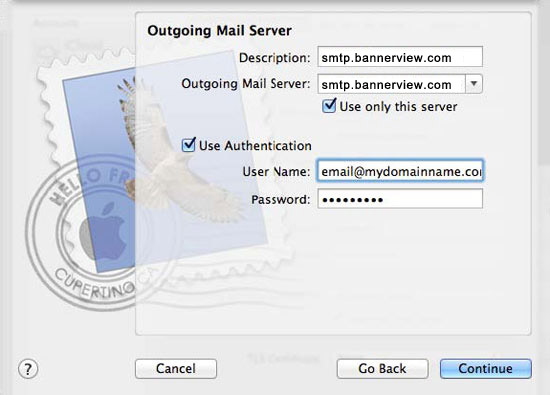
Step 8In the Outgoing Mail Server screen complete the fields as follows:
|
 |
Step 9Click Continue. |
|
Step 10If you receive an error that it cannot connect, Click Continue. There are additional settings that need to be setup. |
|
Step 11: Outgoing Mail Security
|
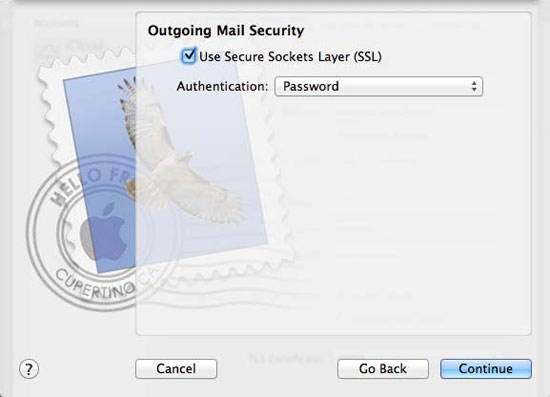 |
Step 12Click Continue. |
|
Step 13: Account Summary
|
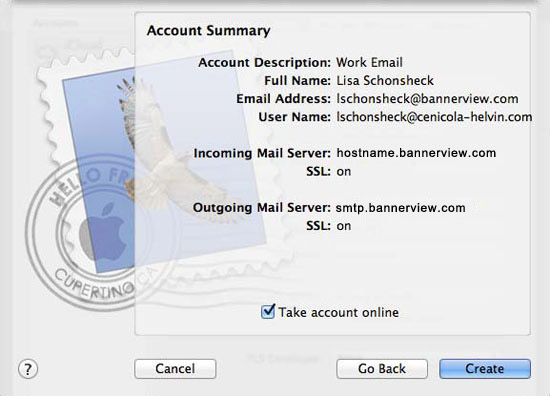 |
Step 14Click Create Once you have created your email account, you will need to change some settings. |
|
Step 15Click on the email you created from the left side bar |
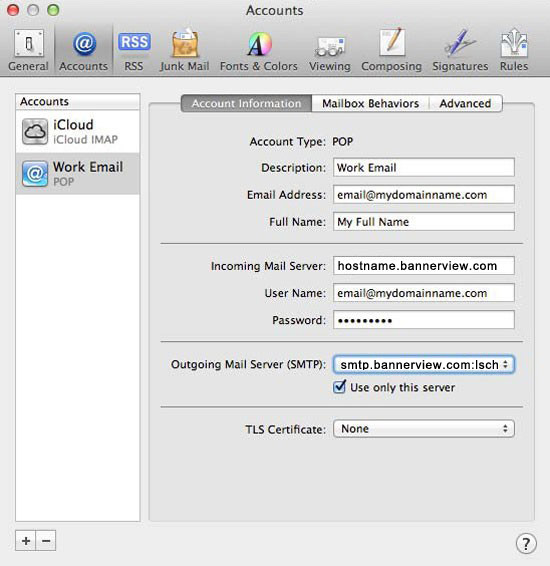 |
Step 16Click on the Outgoing Mail Server Drop Down and choose Edit SMTP Server List |
|
Step 17Click on the Server name smtp.bannerview.com from the list |
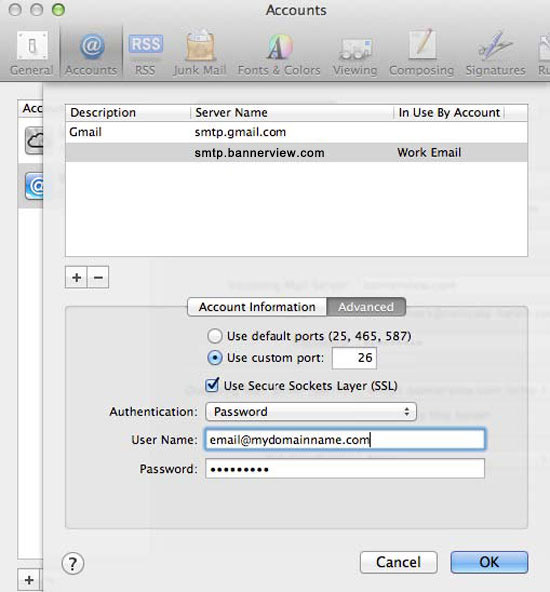 |
Step 18Choose the advanced tab |
|
Step 19Select Use Custom Port and enter in the number 26 |
|
Step 20Check the box use Secure Sockets Layer (SSL), if not already checked |
|
Step 21Authentication: Choose Password from the drop down |
|
Step 22User Name: Enter in your full email address including everything after the @ sign. This is case sensitive and should be all lower case letters. |
|
Step 23Enter in your password that was created for this email account |
|
Step 24Click OK |
|
|
Once you are back to the main settings screen you can close the box and send yourself a test message to make sure you can send and receive. |
|
IMAP
Step 1From the Mail menu, select Preferences. |
|
Step 2Go to the Accounts tab |
|
Step 3Click the plus sign(+) at the bottom of the Accounts box to add a new one. |
|
Step 4In the Add Account window:
|
|
Step 5Click Continue. |
|
Step 6On the Incoming Mail Server screen, complete the fields as follows:
|
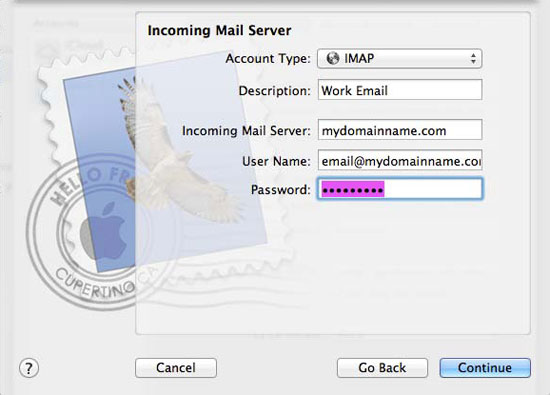 |
Step 7Click Continue. |
|
Step 8In the Outgoing Mail Server screen complete the fields as follows:
|
|
Step 9Click Continue. |
|
Step 10If you receive an error that it cannot connect, Click Continue. There are additional settings that need to be setup. |
|
Step 11: Outgoing Mail Security
|
|
Step 12Click Continue. |
|
Step 13: Account Summary
|
|
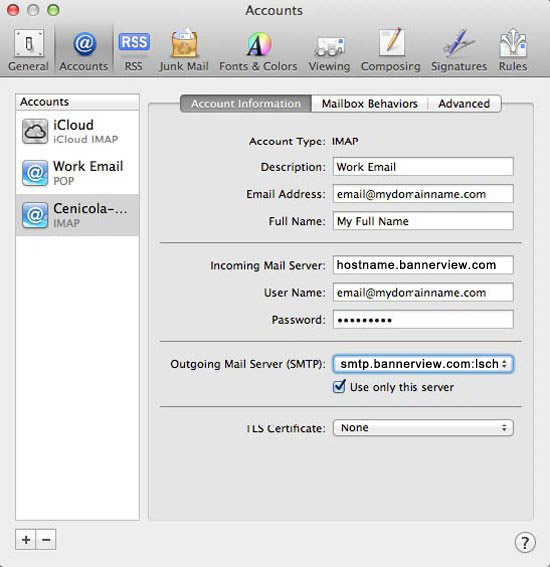
Step 14Click Create Once you have created your email account, you will need to change some settings. |
|
Step 15Click on the email you created from the left side bar |
 |
Step 16Click on the Outgoing Mail Server Drop Down and choose Edit SMTP Server List |
|
Step 17Click on the Server name smtp.bannerview.com from the list |
|
Step 18Choose the advanced tab |
|
Step 19Select Use Custom Port and enter in the number 26 |
|
Step 20Check the box use Secure Sockets Layer (SSL), if not already checked |
|
Step 21Authentication: Choose Password from the drop down |
|
Step 22User Name: Enter in your full email address including everything after the @ sign. |
|
Step 23Enter in your password that was created for this email account |
|
Step 24Click OK |
|
|
Once you are back to the main settings screen you can close the box and send yourself a test message to make sure you can send and receive. |
|