Apple Mail: POP
(Scroll down for IMAP settings)
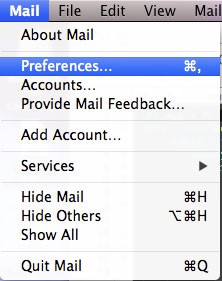
Step 1
From the Mail menu, select Preferences.
|
 |
Step 2
Go to the Accounts tab.
|
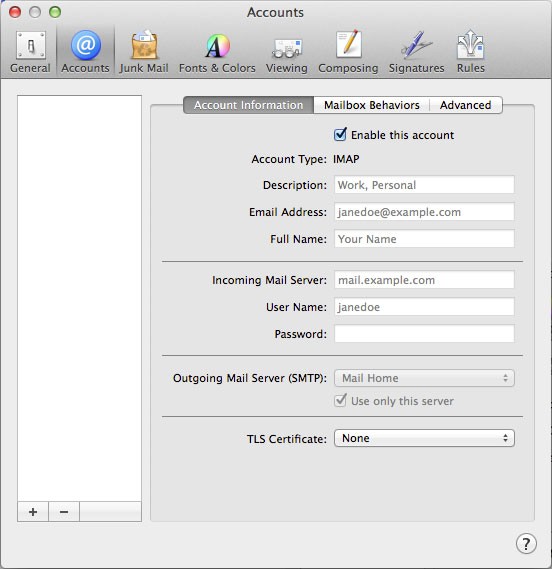 |
Step 3
Click the plus sign (+) at the bottom of the Accounts box to add a new one.
|
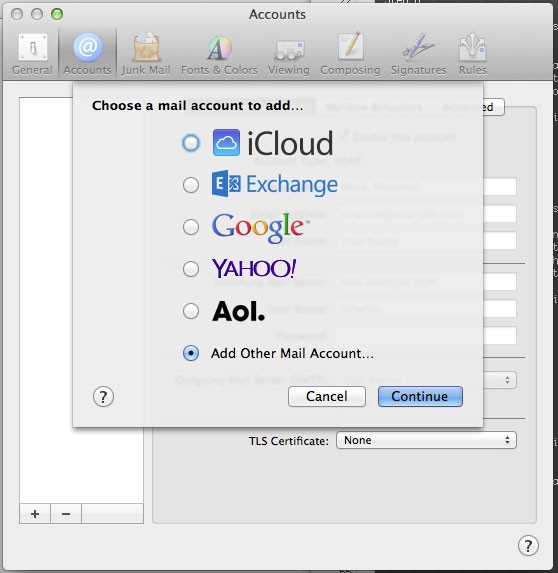
Step 4
Check Add Other Account... and click Continue.
|
 |
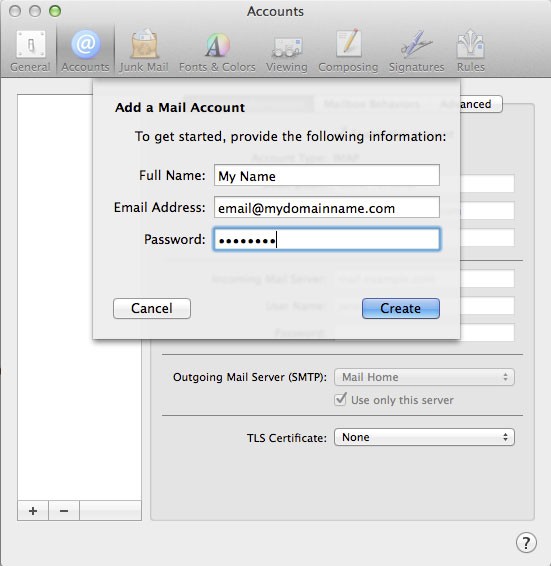
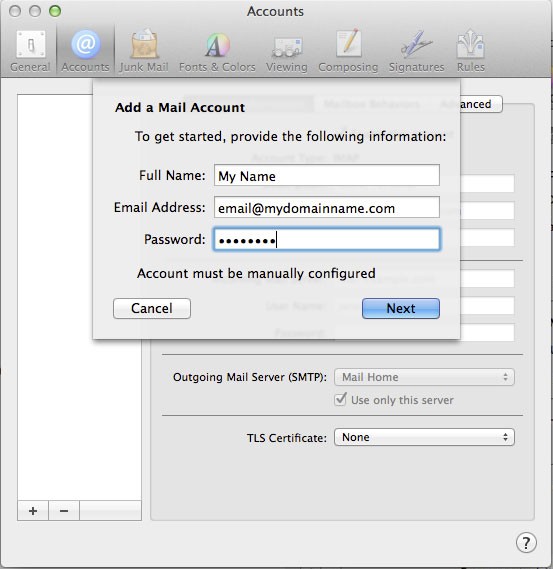
Step 5
In the Add a Mail Account window:
- Full Name: Enter your full name as it will be seen by others.
- Email Address: Enter your full email address.
- Password: Enter your email password created for you for this email account.
|
 |
Step 6
Click Create. It will then say Account must be manually configured. Click Next.
|
 |
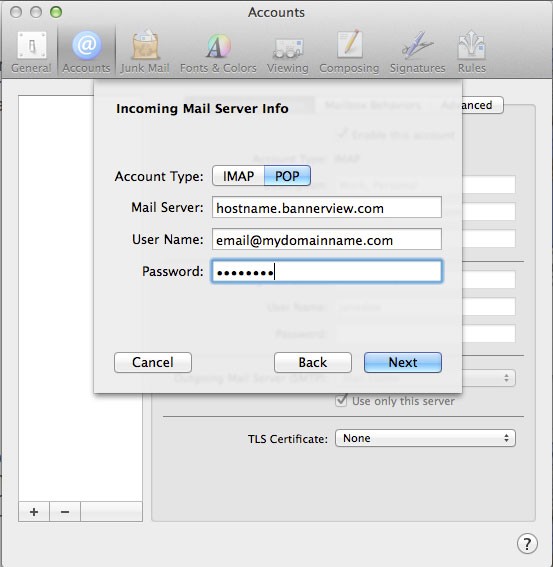
Step 7
On the Incoming Mail Server screen, complete the fields as follows:
- Account Type: select POP
- Mail Server: Enter in planname.bannerview.com
(Replace 'planname' with your hosting plan name, which is usually the same as your BannerView.com hosting account username. If you're not sure, your plan name can be found in the Welcome email you received when you signed up for services, or by logging into your BannerView.com hosting account and scrolling to the bottom of the Account Dashboard. Confused? Watch this Video).
- User Name: Enter your full email address including the domain name after the @ sign. This is case sensitive and should be all lower case letters.
- Password: Enter your email password created for you for this email account.
Click Next.
|
 |
Step 8
In the Outgoing Mail Server screen complete the fields as follows:
- SMTP Server: Enter in smtp.bannerview.com
- User Name: Enter your full email address including the domain name after the @ sign. This is case sensitive and should be all lower case letters.
- Password: Enter your email password created for you for this email account.
|
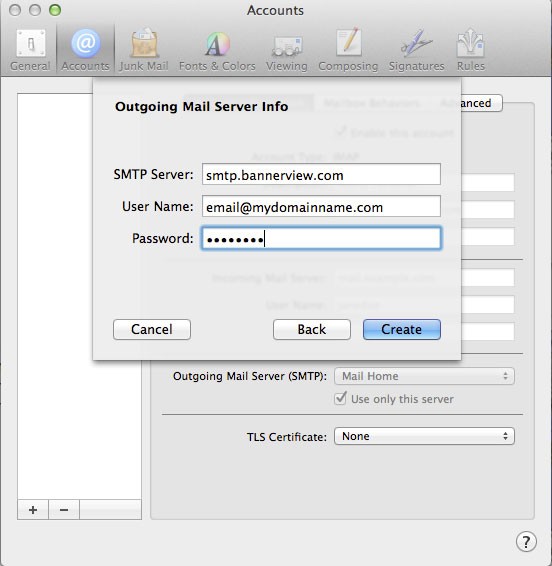 |
Step 9
Click Create.
|
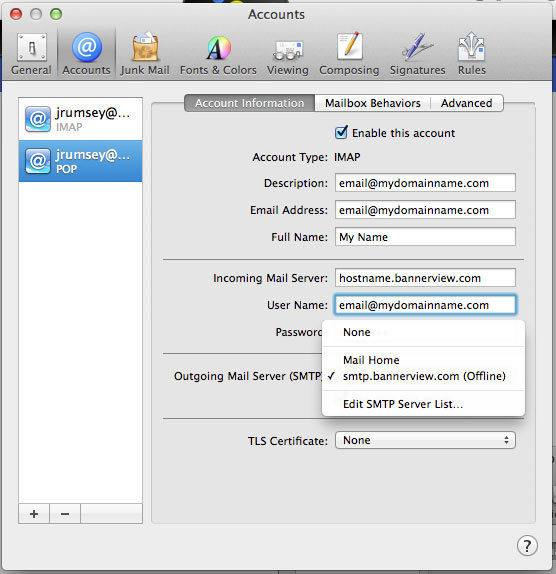
Step 10
After the account is created, under the Outgoing Mail Server (SMTP) drop down select Edit SMTP Server List...
|
 |
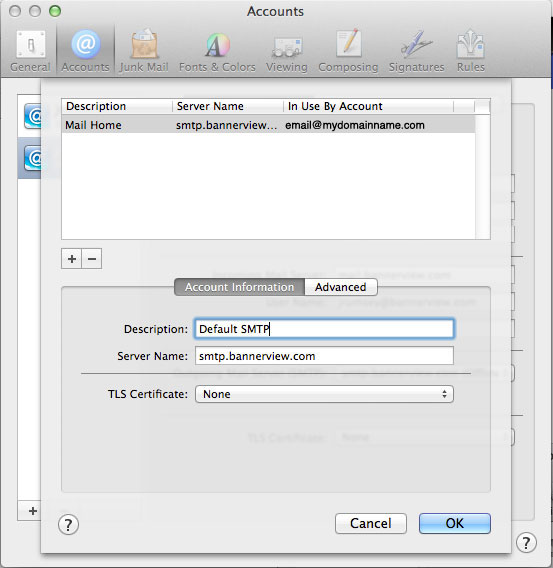
Step 11
In the Account Information Window, complete the fields as follows:
- Description: Enter in a name for server or enter in the server name as shown in the screenshot
- Server Name: smtp.bannerview.com
|
 |
Step 12
Click Advanced.
|
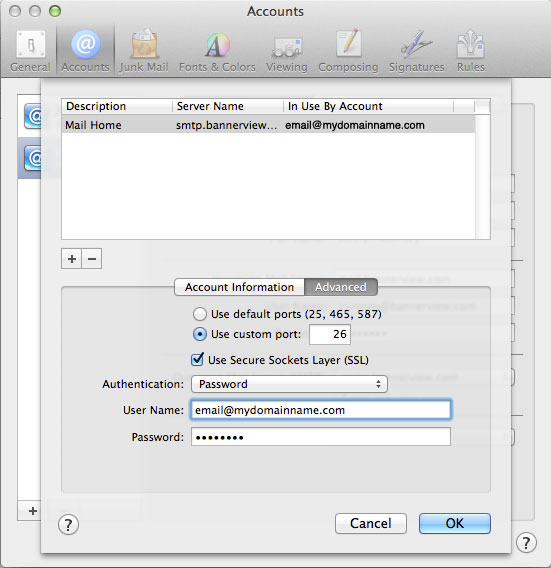
Step 13
In the Advanced Window, complete the fields as follows:
- Select Use Custom Port and enter in the number 26
- Check Use Secure Sockets Layer (SSL)
- Authentication Password
- User Name: Enter your full email address including the domain name after the @ sign. This is case sensitive and should be all lower case letters.
- Password: Enter your email password created for you for this email account.
|
 |
|
Once you are back to the main settings screen you can close the box and send yourself a test message to make sure you can send and receive.
|
Apple Mail: IMAP
Step 1
From the Mail menu, select Preferences.
|
|
Step 2
Go to the Accounts tab.
|
|
Step 3
Click the plus sign (+) at the bottom of the Accounts box to add a new one.
|
Step 4
Check Add Other Account... and click Continue.
|
|
Step 5
In the Add a Mail Account window:
- Full Name: enter your full name as it will be seen by others.
- Email Address: Enter your full email address.
- Password: Enter your email password created for you for this email account.
|
|
Step 6
Click Create. It will then say Account must be manually configured. Click Next.
|
|
Step 7
On the Incoming Mail Server screen, complete the fields as follows:
- Account Type: select IMAP
- Mail Server: Enter in planname.bannerview.com
(Replace 'planname' with your hosting plan name, which is usually the same as your BannerView.com hosting account username. If you're not sure, it can be found in the Welcome email you received when you signed up for services, or by logging into your BannerView.com hosting account and scrolling to the bottom of the Account Dashboard. Confused? Watch this Video).
- User Name: Enter your full email address including the domain name after the @ sign. This is case sensitive and should be all lower case letters.
- Password: Enter your email password created for you for this email account.
Click Next. It will then say Additional account information required. Click Next again.
|
 |
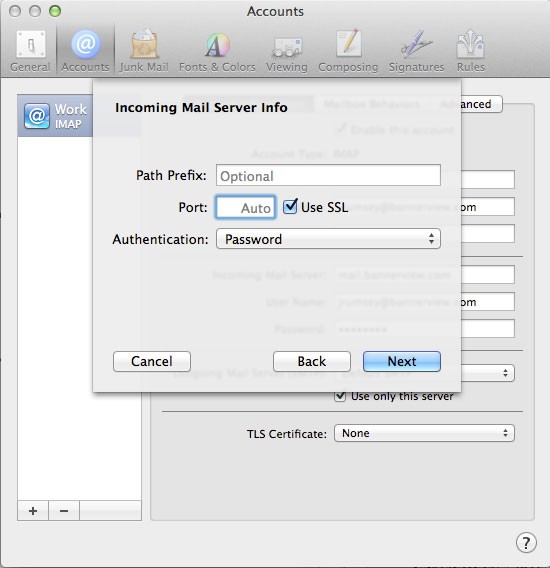
Step 8
On the Incoming Mail Server Info screen, complete the fields as follows:
- Path Prefix: Leave blank.
- Port: Check Use SSL, leave the field at Auto.
- Authentication: Password.
Click Next.
|
 |
Step 9
In the Outgoing Mail Server screen complete the fields as follows:
- SMTP Server: Enter in smtp.bannerview.com
- User Name: Enter your full email address including the domain name after the @ sign. This is case sensitive and should be all lower case letters.
- Password: Enter your email password created for you for this email account.
|
|
Step 10
Click Create.
|
Step 11
After the account is created, under the Outgoing Mail Server (SMTP) drop down select Edit SMTP Server List...
|
|
Step 12
In the Account Information Window, complete the fields as follows:
- Description: Enter in a name for server or enter in the server name as shown in the screenshot
- Server Name: smtp.bannerview.com
|
|
Step 13
Click Advanced.
|
Step 14
In the Advanced Window, complete the fields as follows:
- Select Use Custom Port and enter in the number 26
- Check Use Secure Sockets Layer (SSL)
- Authentication Password
- User Name: Enter your full email address including the domain name after the @ sign. This is case sensitive and should be all lower case letters.
- Password: Enter your email password created for you for this email account.
|
|
|
Once you are back to the main settings screen you can close the box and send yourself a test message to make sure you can send and receive.
|