Thunderbird (Mac) POP Account
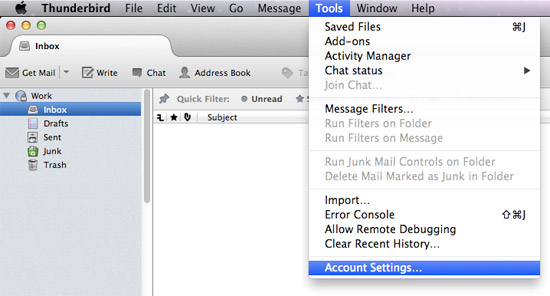
Step 1In Mozilla Thunderbird, from the Tools menu select Account Settings. |
 |
Step 2Select Account Actions from the bottom of the screen |
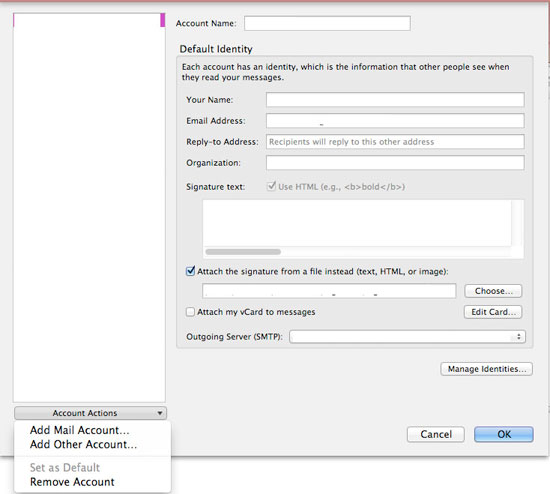 |
Step 3Click on Add Mail Account |
|
Step 4: Mail Account Setup
|
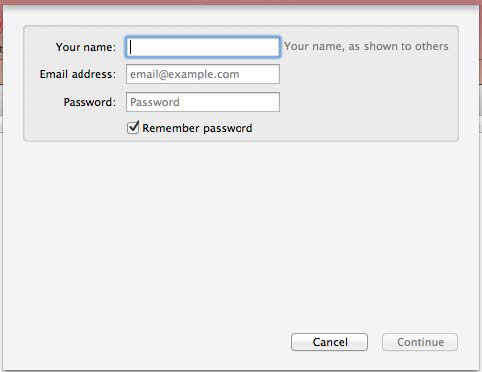 |
Step 5Click Continue |
|
Step 6Click Manual Config |
 |
Step 7Enter in the fields as follow:
|
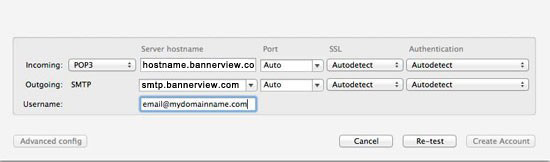 |
Step 8Click Re-Test |
|
Step 9Next to Outgoing, Change the Port from 25 to 26 |
|
Step 10Click Create Account |
|