Outlook 2010
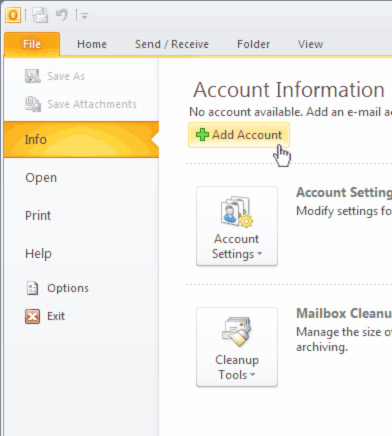
Step 1From your menu bar, select File > Add Account. |
 |
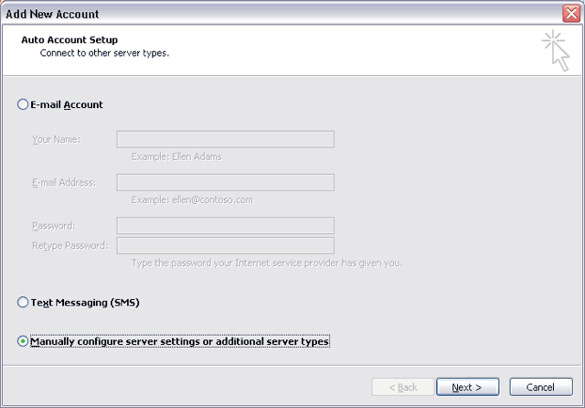
Step 2The Add New Account window will open. Select Manually configure server settings or additional server types. Click next. |
 |
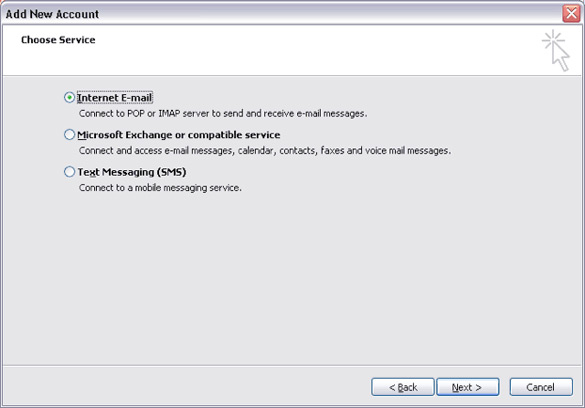
Step 3Select Internet E-mail, click next. |
 |
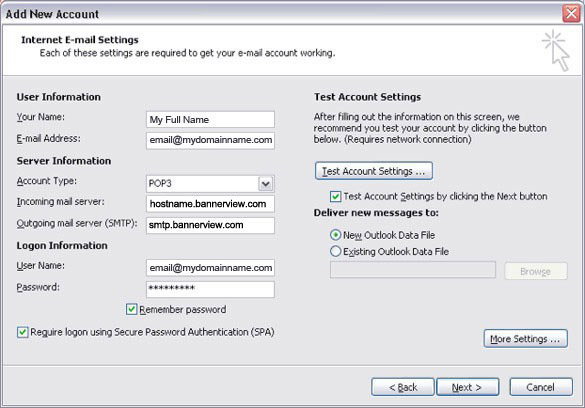
Step 4Enter the name you wish to be displayed when you send email from this account. This may be your name (ex. John Smith), or a department (ex. Sales). Enter your full email address. Account Type: The drop-down menu should be grayed out and show POP3. If not, select POP3. Incoming server: Enter in planname.bannerview.com Outgoing server: Enter your SMTP server address: smtp.bannerview.com User Name: Enter your full email address including the domain name after the @ sign. This is case sensitive and should be all lower case letters. Password: Enter the password for that email address. Click More Settings. |
 |
Step 5The Internet E-Mail Settings window will open. Click the Outgoing Server tab. Check the box My outgoing server (SMTP) requires authentication. |
 |
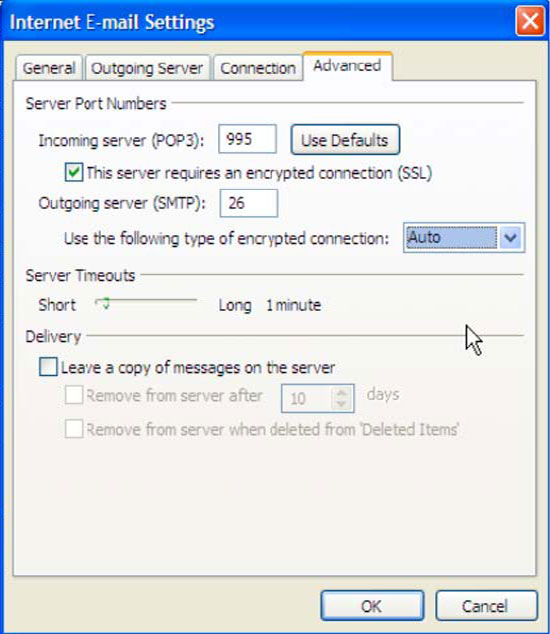
Step 6Click the Advanced tab. Make sure the settings below match. Incoming Server: 995 Check the box: This server requires an encrypted connection (SSL) Outgoing Server: 26 (if 26 does not work, please change to 587) Use the following type of encrypted connection: Auto. Click Ok. |
 |
Step 7You will go back to the previous screen. Click Next. |
|
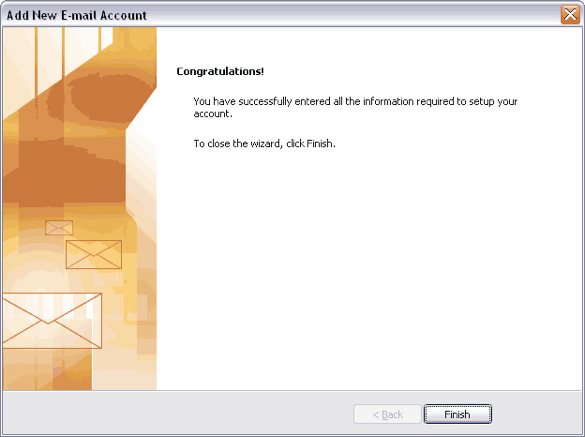
Step 8You are finished! Outlook may try to test your settings and connect to the email server. If you get any errors, verify you entered all of the information correctly and that you followed Step 5. Click Finish. |
 |