Outlook 2013
Step 1
Open Microsoft Outlook 2013
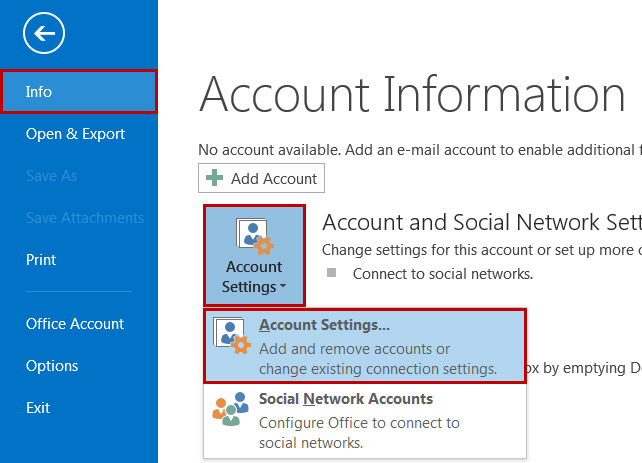
Click File > Info > Account Settings > Account Settings...
Step 2
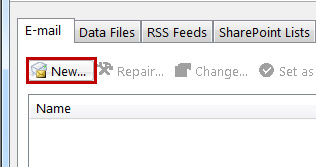
Under the Email tab, click New...
Step 3
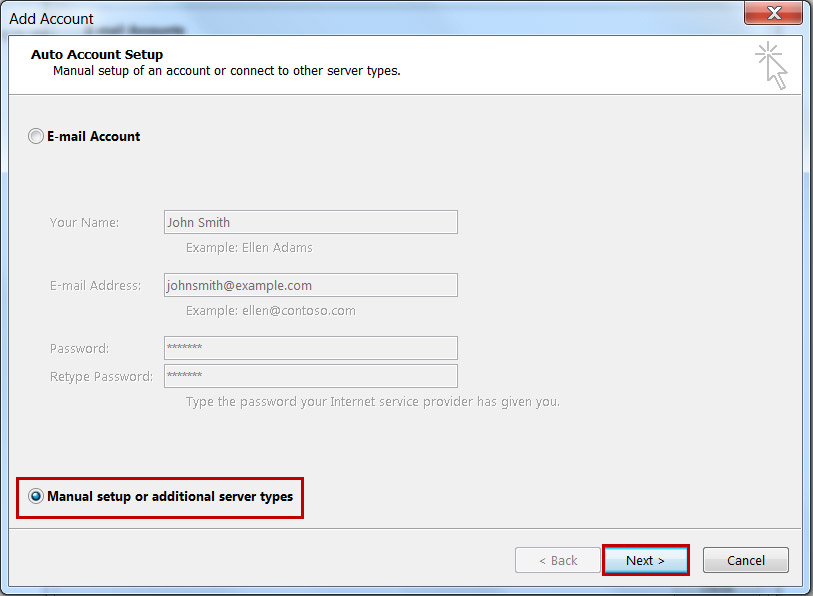
Choose the Manual setup or additional server types option and click Next.
Step 4
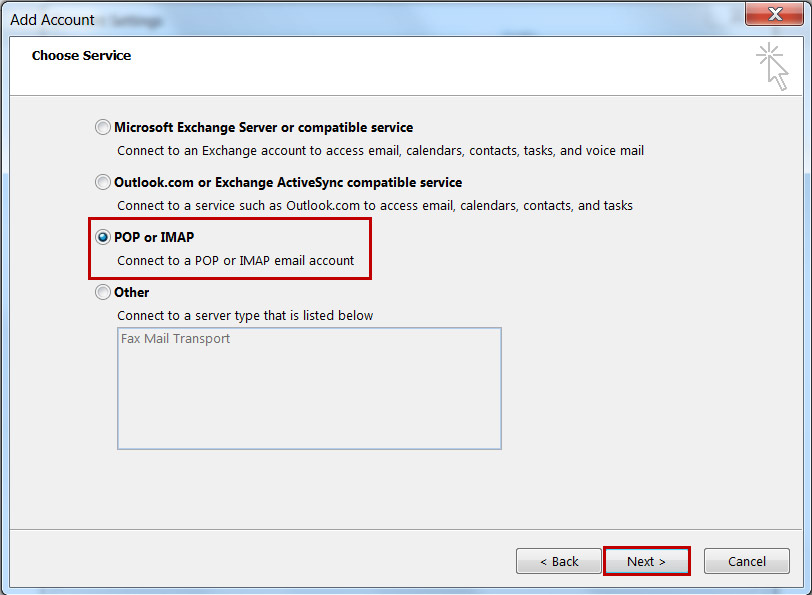
Choose the POP or IMAP option and click Next.
Step 5
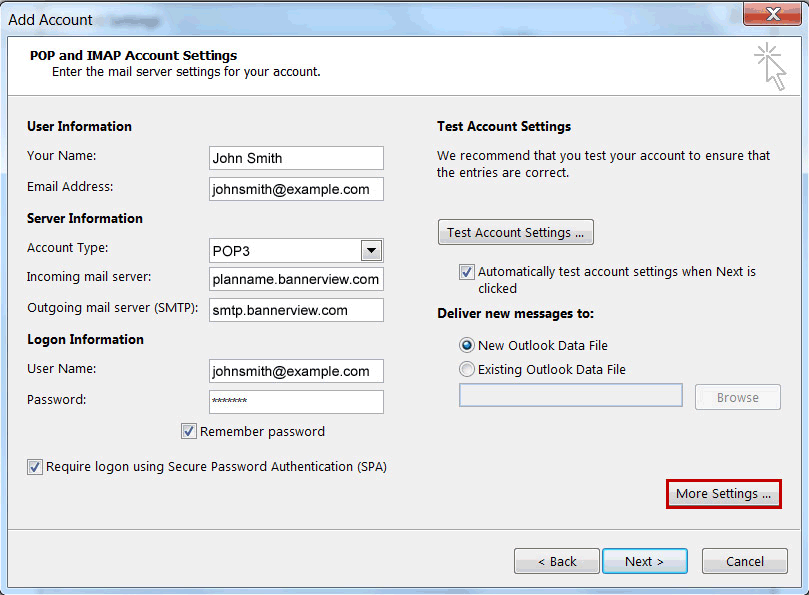
Fill out the empty fields.
Your Name: The name you want people to see when they receive your emails.
Email Address: Enter your full email address.
Account Type: Choose POP3.
Incoming Mail Server: Enter planname.bannerview.com
(Replace 'planname' with your hosting plan name, which is usually the same as your BannerView.com hosting account username. If you're not sure, your plan name can be found in the Welcome email you received when you signed up for services, or by logging into your BannerView.com hosting account and scrolling to the bottom of the Account Dashboard. Confused? Watch this Video)
Outgoing Mail Server: Enter smtp.bannerview.com.
User Name: Enter your full email address including the domain name after the @ sign. This is case sensitive and should be all lower case letters.
Password: Enter the password used for your email account.
Click More Settings...
Step 6
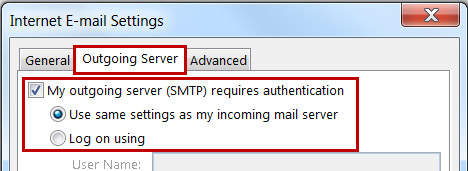
Under the Outgoing Server tab, choose My outgoing mail sever (SMTP) requires authentication and Use same settings as incoming mail server.
Step 7
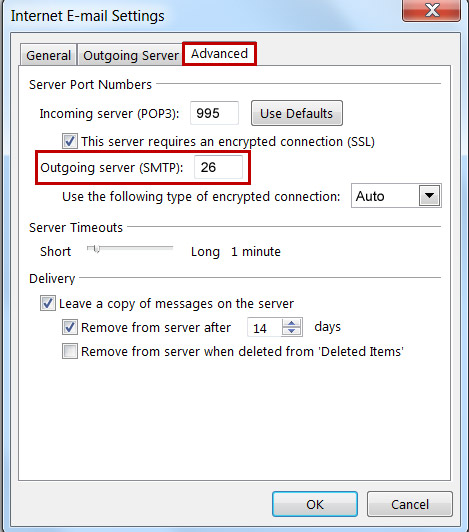
Under the Advanced tab, do the following:
Incoming server (POP3): Enter 995.
Choose the This server requires an encrypted connection (SSL) option.
Outgoing server (SMTP): Enter 26.
In the drop down menu for Use the following type of encrypted connection choose Auto.
Click OK, then Next, then Finish.