Outlook Express
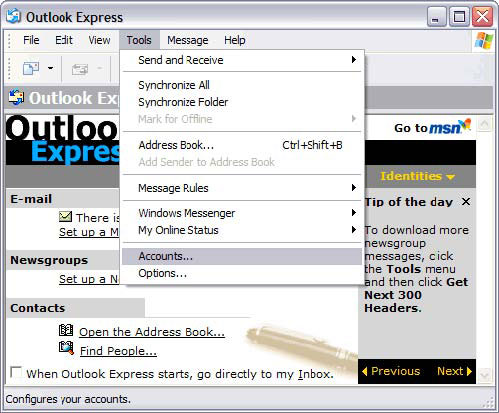
Step 1In Microsoft Outlook Express, from the Tools menu, select Accounts. |
 |
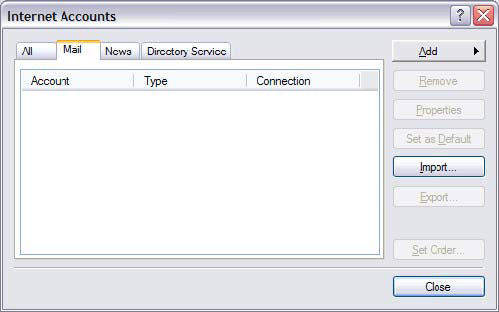
Step 2Go to the Mail tab and from the Add menu, select Mail. |
 |
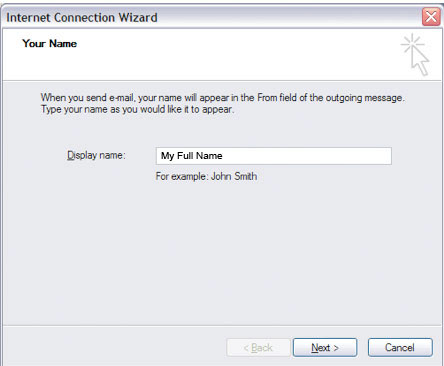
Step 3In the Display Name field, enter you full name and click Next. |
 |
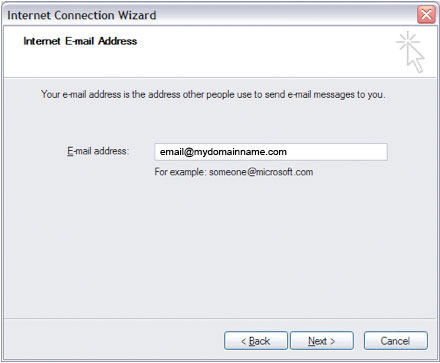
Step 4In the E-mail address field, enter your email address and click Next. |
 |
Step 5On the E-mail Server Names page, complete your information as follows:
|
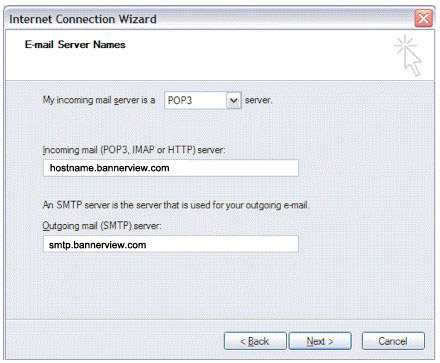 |
Step 6Click Next. |
|
Step 7In the Account Name and Password fields, enter your email address and password. Account Name should be your full email address including the domain name after the @ sign. This is case sensitive and should be all lower case letters. |
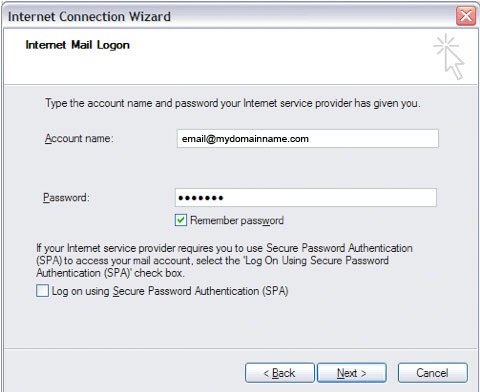 |
Step 8Click Next. |
|
Step 9On the setup confirmation page, click Finish. |
 |
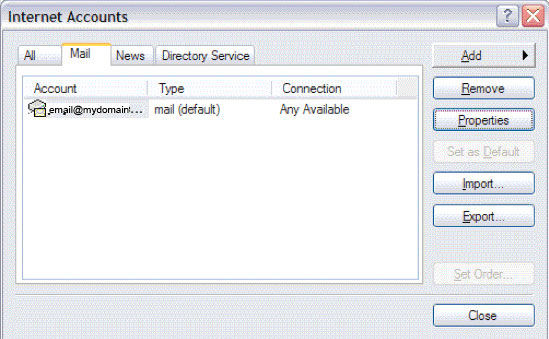
Step 10On the Mail tab, select the account you just created, and then click Properties. |
 |
Step 11Go to the Servers tab. |
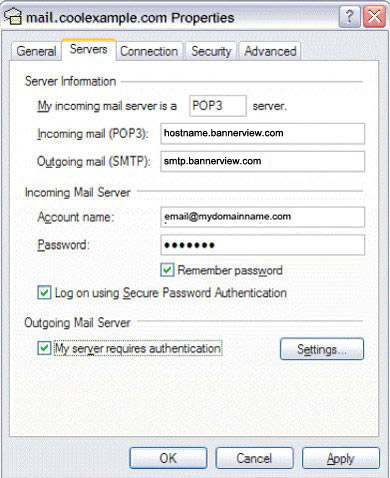 |
Step 12Check the box My Server Requires Authentication |
|
Step 13Click Apply |
|
Step 14: Account SummaryGo to the Advanced tab. |
|
Step 15If not already set, change the following settings: Outgoing Mail: 25 (26 if you use Cox and 25 does not work for you) Check the box: This server requires a secure connection Incoming Mail: 995 Check the box: This server requires a secure connection |
 |
Step 16: (Optional)If you want to keep a copy of email messages stored on your email provider's servers, in the Delivery section, select Leave a copy of messages on server. |
|
Step 17Click Apply |
|
Step 18Click OK |
|
|
Your Outlook Express account is now set up. Click Close to close the Accounts window and return to your Outlook Express. |
|