Outlook 2007
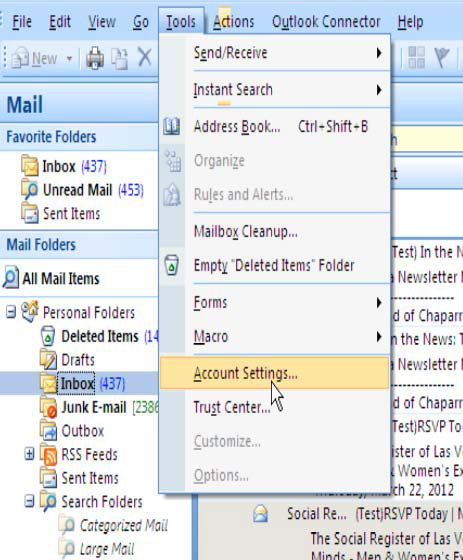
Step 1In Microsoft Outlook, from Tools menu, select Account Settings |
 |
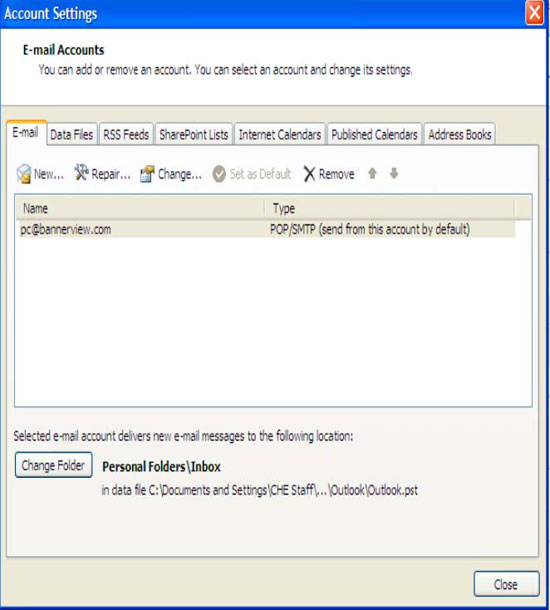
Step 2From the Email tab, click New to add a new email account. |
 |
Step 3Choose Email Service Select the box: Microsoft Exchange, POP3, IMAP, or HTTP |
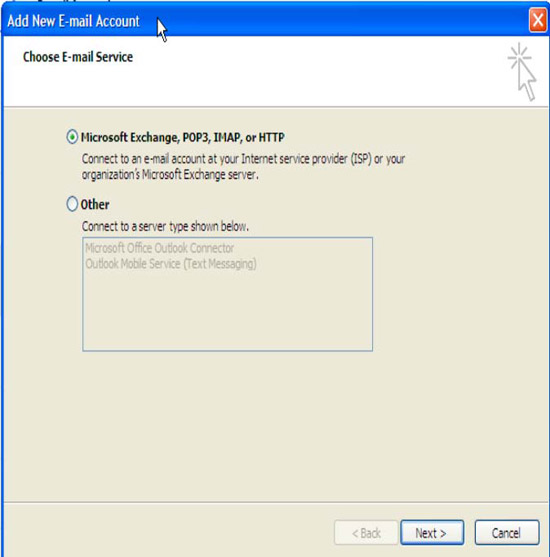 |
Step 4Click Next. |
|
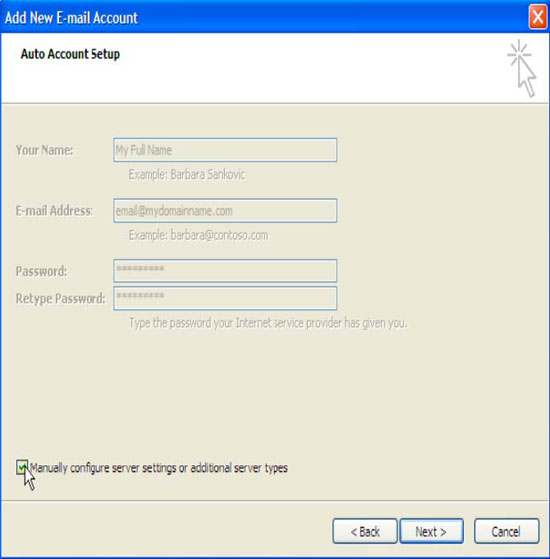
Step 5Auto Account Setup Your Name: Enter in your name as it will appear to other. Email Address: Enter in your email address Password: Enter in your password that was created for this email address Retype Password: Retype in the password to make sure it was typed in correctly |
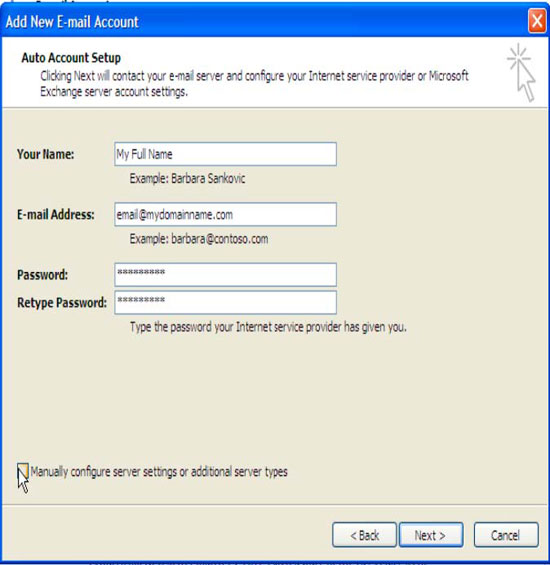 |
Step 6Check the box: Manually configure Settings or additional server types |
 |
Step 7Click Next |
|
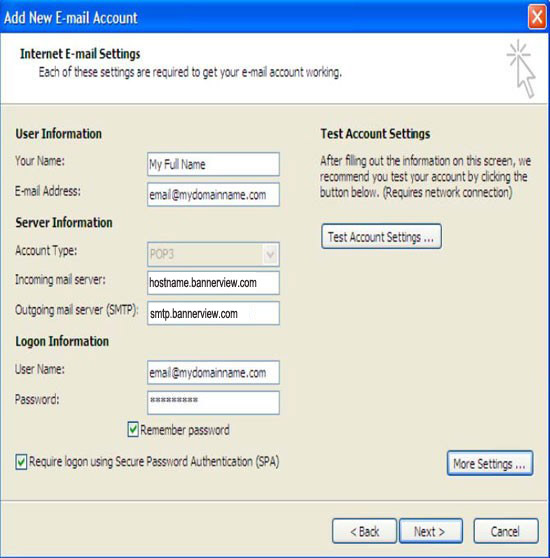
Step 8: Internet Email SettingsComplete the fields as specified below:
|
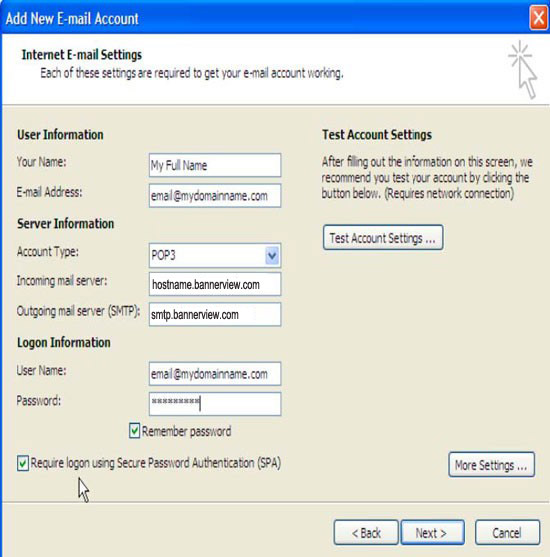 |
Step 9Click on More Settings |
|
Step 10Click on Outgoing Server tab |
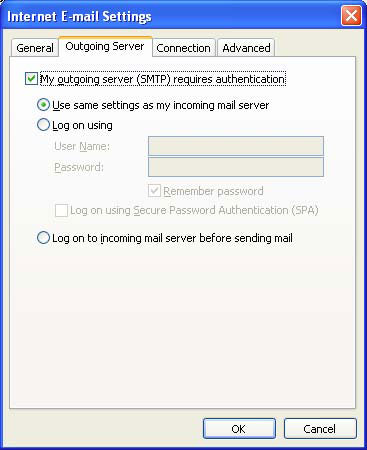 |
Step 11: Outgoing Mail SecurityCheck the box: My outgoing server requires authentication Select the box: Use same settings as my incoming mail server |
|
Step 12Click on the Advanced Tab |
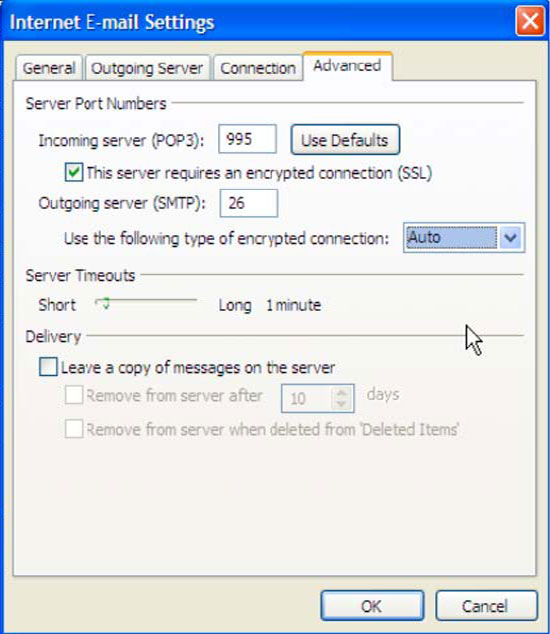 |
Step 13: Account SummaryChange the following settings: Incoming Server: 995 Check the box: This server requires an encrypted connection (SSL) Outgoing Server: 26 (if 26 does not work, please change to 25. Use the following type of encrypted connection: Auto |
|
Step 14Click Ok |
|
Step 15Click Test Account Settings |
 |
Step 16When you see completed and two green check marks, you've successfully created your email account. Click Close |
 |
Step 17Click Next |
 |
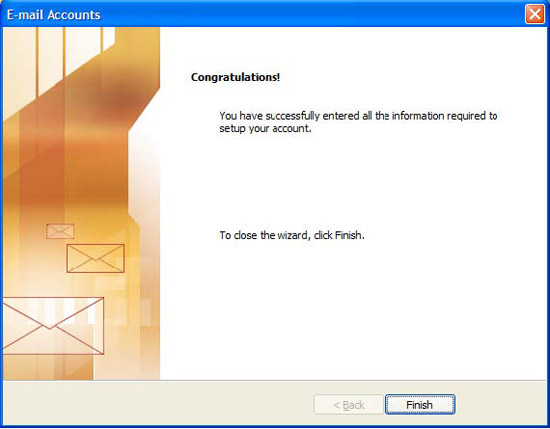
Step 18Click Finish |
 |