BannerBilling: Create & Modify Customers
In BannerBilling, customers are the ones that are paying for your service, whether they’re individuals or companies. Each customer has at least one contact, and depending on the other grips configured on your system, those customers and contacts can be linked to account managers that are part of your staff, and existing members of your website.
To Add a New Customer:
While in the BannerBilling grip, click Customers > Add New in the top navigation, or click the Add New Customer icon on the BannerBilling dashboard's All Options tab. See Customer Settings below.
To Modify an Existing Customer:
While in the BannerBilling grip, click Customers > Manage in the top navigation, or click the Manage Customers icon on the BannerBilling dashboard's All Options tab. Then locate the appropriate customer from the list and click on the customer name or the arrow next to View > Modify Customer. See Customer Settings below.
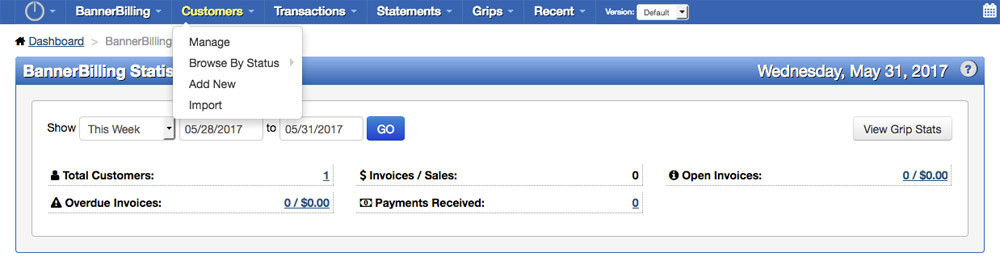
Customers can be added manually or imported from svc either from icons on the dashboard or the customers drop down at the top of the screen. Clicking 'Add New' brings up the New Customer Screen.
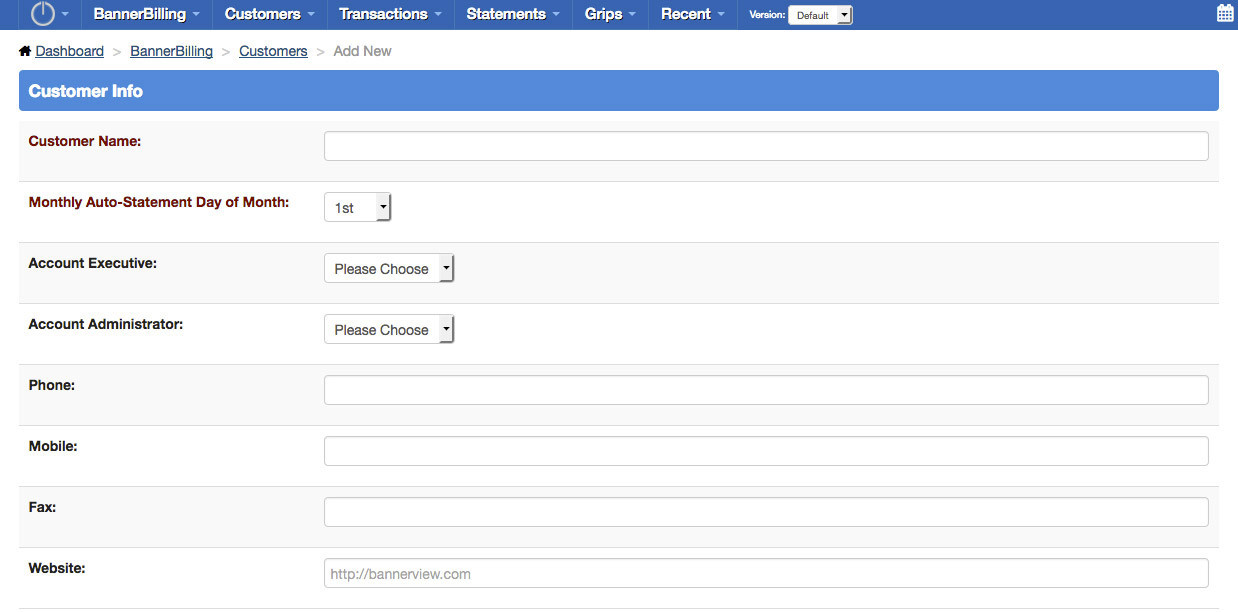
The first section provides fields for customer name, website, various phone numbers, and a few for account administration. Those are the Account Executive, Account Administration, and Monthly Auto-Statement Day. Statements will be covered in greater depth later but if you have staff configured in BannerRoster, you can select a member of your staff to associate with the customer for support or administration.
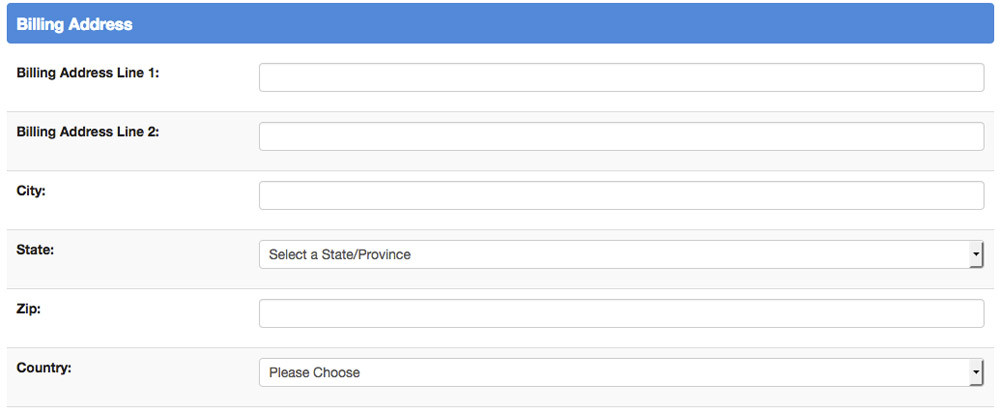
The second section is where you populate the billing address for the customer.
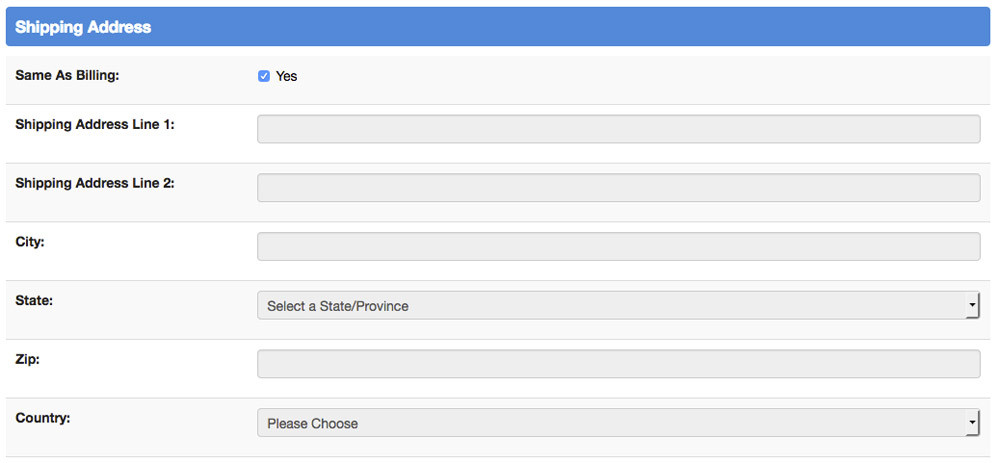
There is a third section for the shipping address, by default the 'Same As Billing' option is checked and all fields are disabled. In the event that the customer has a different shipping address, just uncheck the box and update accordingly.
The next step is to configure a primary contact for the customer. If you have BannerRoster installed and configured, you'll have the option to use an existing member, or create a new member based on the contact. Additionally you will always have the default option of adding a non-member individual as the contact.
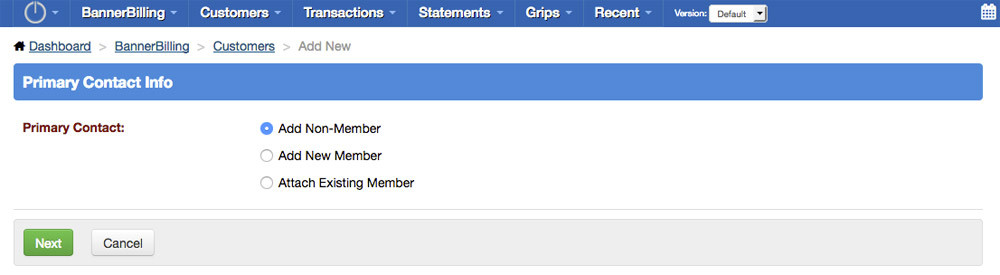
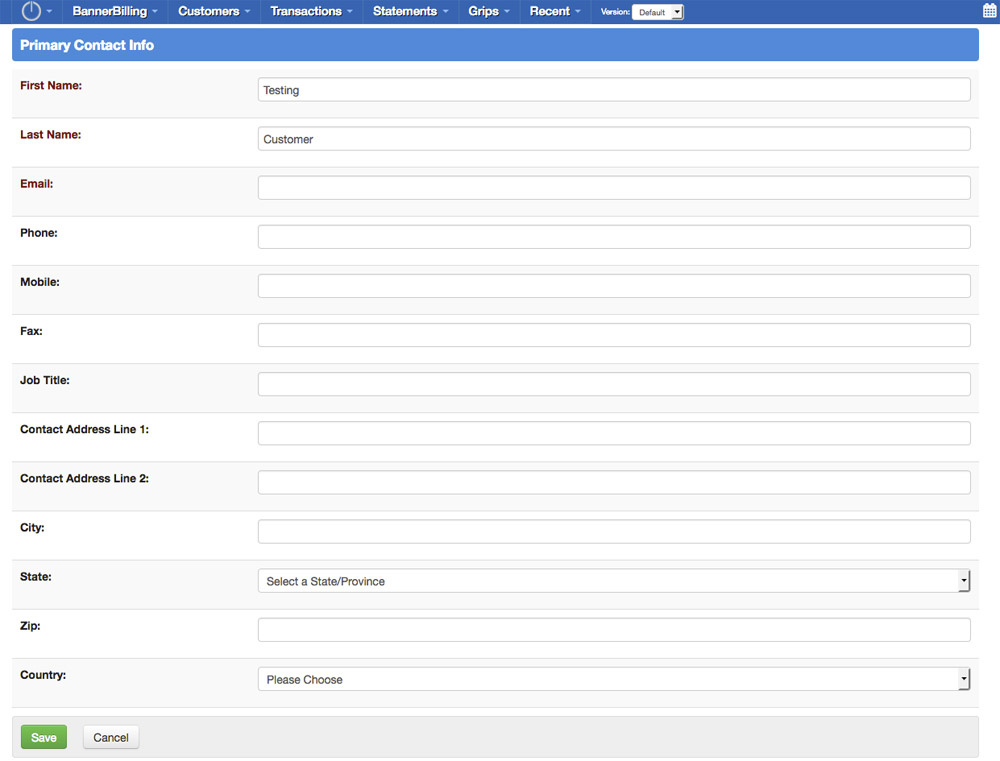
When adding a non-member contact, some of the information will still be populated based on the customer information, specifically the first name, phone number, and address fields.
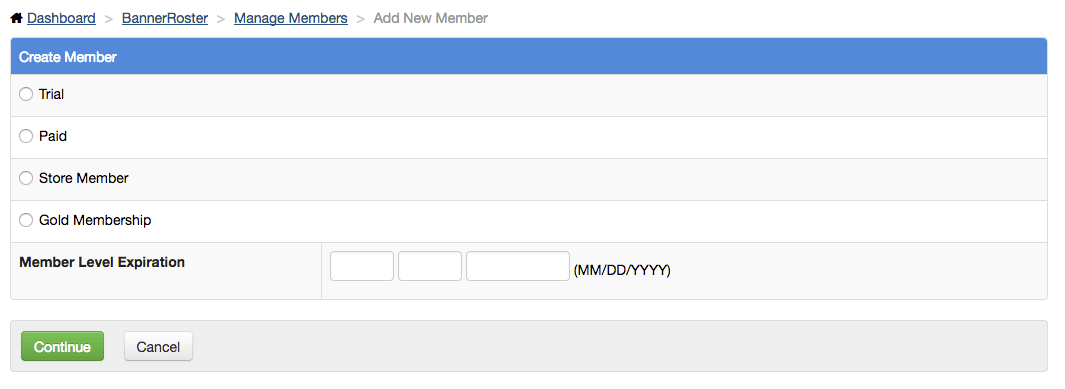
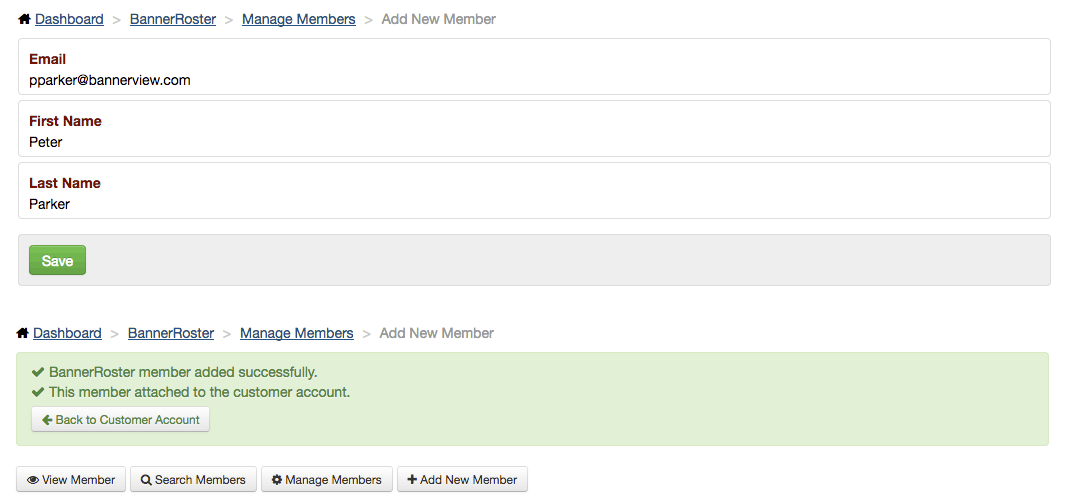
Selecting to create a new member will instead take you to your 'Add New Member' screen, configured through BannerRoster. The first screen will have you choose a member level and expiration date.
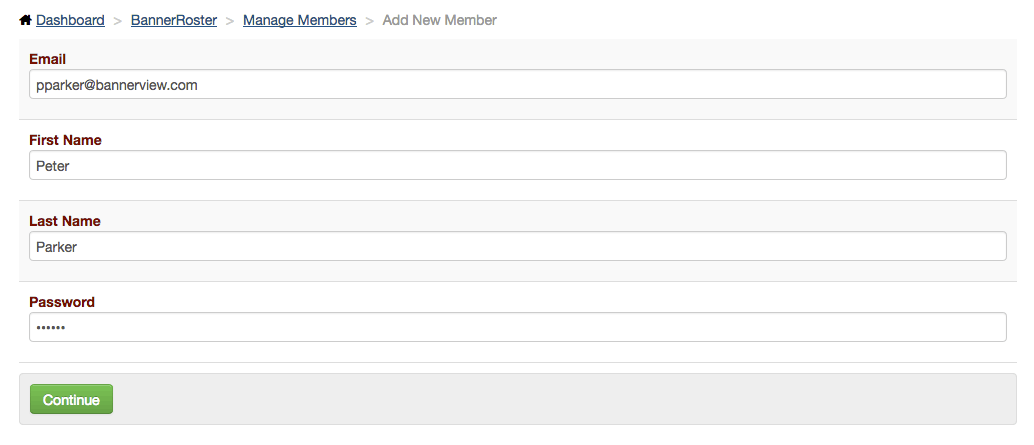
Next you'll have to enter required member information, name, email, and password.
Clicking continue will take you to the verify screen for member creation, where you can click save and finalize the member while adding them to the account.
The last option for creating your initial contact, if you have BannerRoster installed and configured, is to select an existing member as the contact. Selecting that option will take you to your member search screen in BannerRoster.
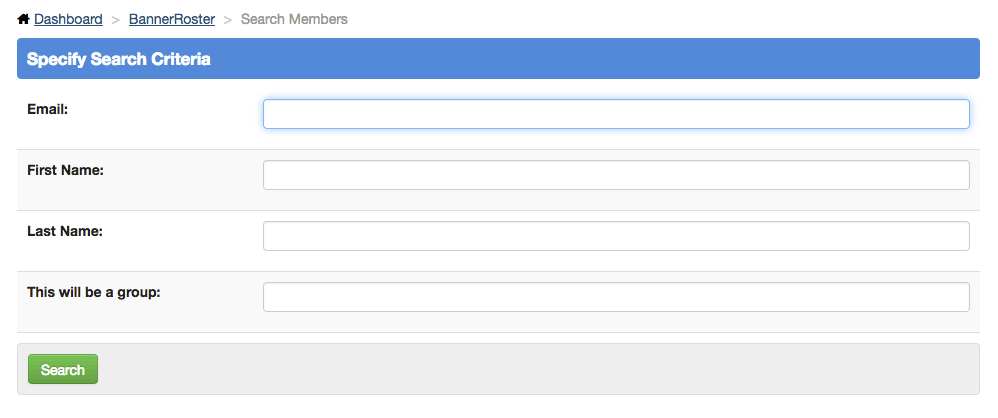
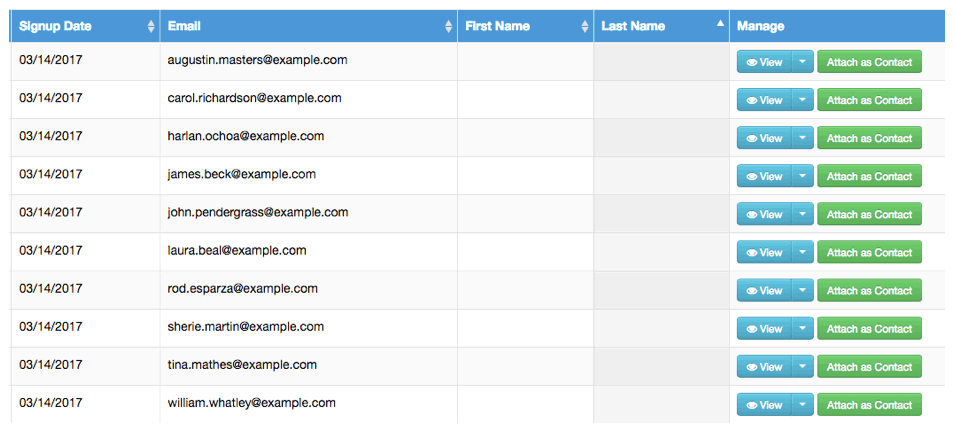
Leaving the fields blank will return a list of all of your members, or narrow the results by providing actual criteria. On the results page, you can click 'Attach as Contact' next to the member you'd like to make a contact. If there are multiple members that you'd like to make contacts, click the button next to the one you'd like to make the primary contact, then go back and add the others from the Manage Customer screen as the customer and contact will be finalized as soon as you click Attach.
In addition to manually adding customers individually you can import a CSV file to begin the creation process for multiple customers at once. It will create customers and contacts for each record successfully imported, but because of the limited number of fields, you will need to go through and fill in the gaps in information manually.
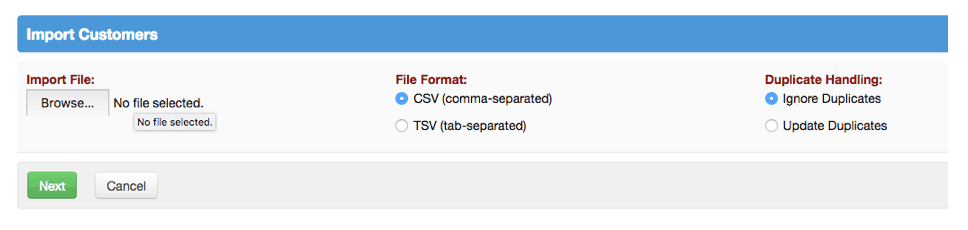
Clicking the 'Import Customers' icon on the dashboard will take you to the import screen where you can select the file to import, and specify the formatting and duplicate handling.
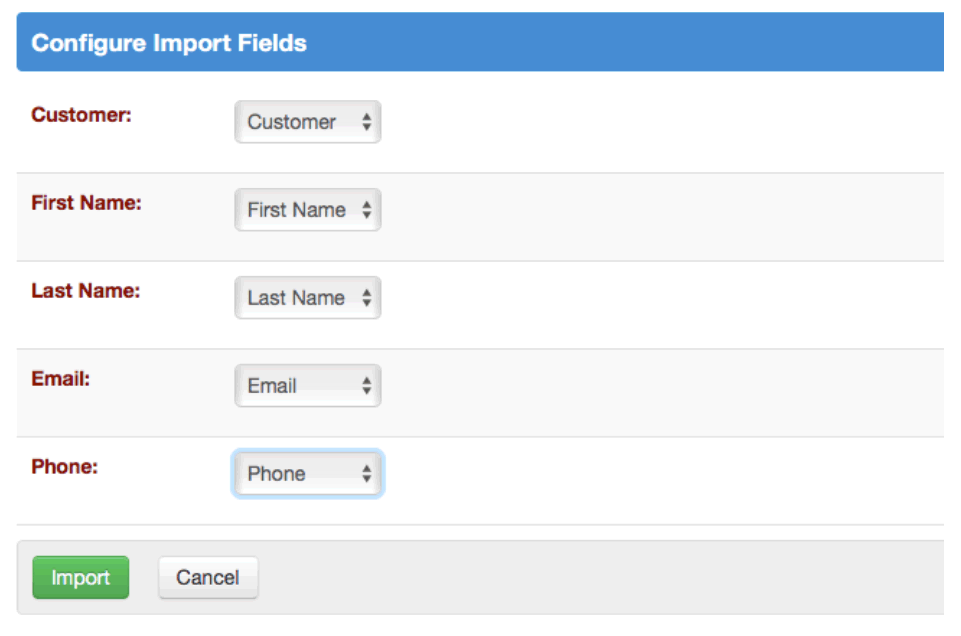
The next screen lets you map the fields in your file to the fields that will be populated. Currently those include Customer[name], first and last name for the contact, email address and phone. Select the corresponding column headers from your file in the drop downs on the right and click 'Import'.
Assuming there are no issues, you will receive a success message and be taken to the manage customers screen
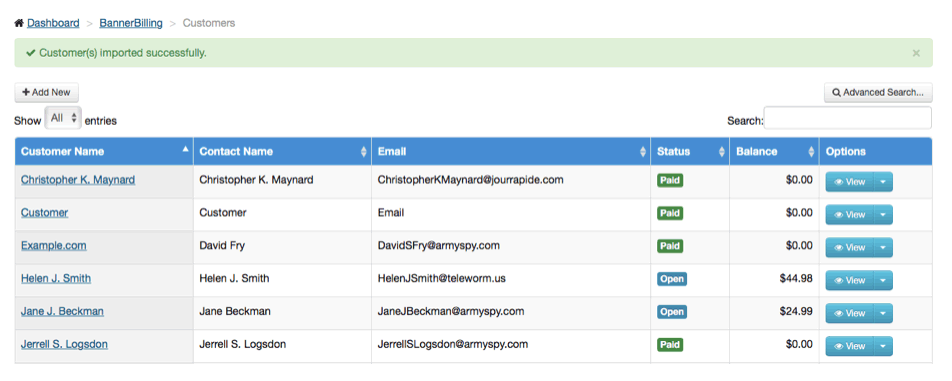
Clicking 'View' or the customer name at this point will take you to the Customer Overview screen you would be taken to after finalizing the customer creation manually instead of importing.
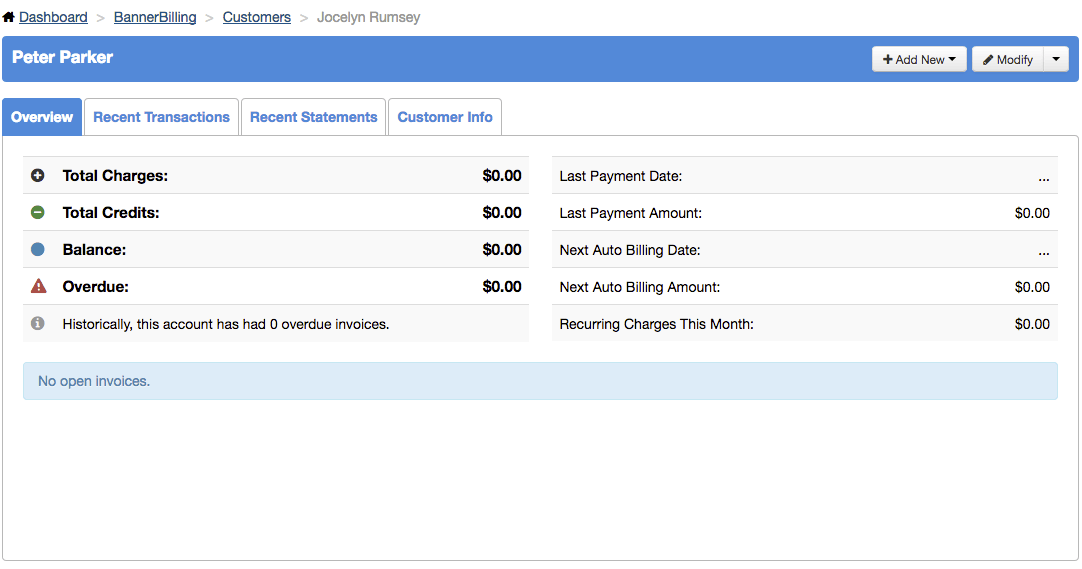
Here you can create new transactions (payment, invoice, statement, estimate, note) and view or modify customer and contact information.