BannerMerchant: Create & Modify Product Categories
The first step of listing your products is to define categories to group them. A single product can have multiple categories, but each must have at least one. The example store I am creating sells two categories of products, widgets and cogs, so a category needs to be created for each. Start by clicking on the ‘Add New Category’ icon in the ‘Categories’ tab of the dashboard, or ‘Add New’ from the ‘Categories’ drop down at the top.
To Modify an Existing Category:
While in the BannerMerchant grip, click Categories > Manage in the top navigation, or click the Manage Categories icon on the BannerMerchant dashboard's All Options tab. Then locate the appropriate category from the list and click on the category name or Edit. See Category Settings below.
Category Settings
On the Add New Category page, there are fields to give the category a name, specify a parent category in the event that you’re creating a specialty / sub category, and specify or create a display page.
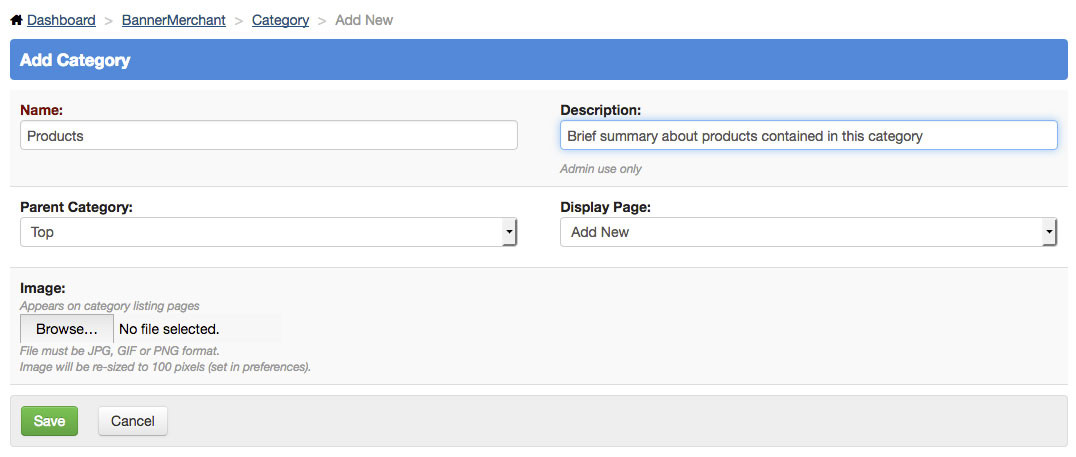
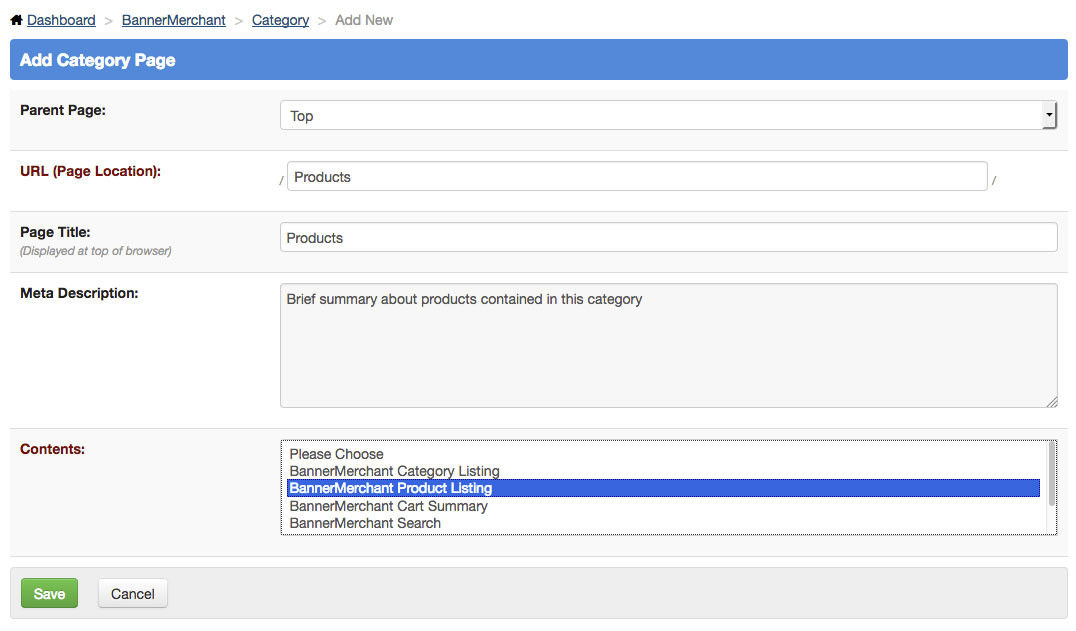
If you elect to create a new page for the display page, you’ll be presented with more options, to specify the details of the page. I am selecting a ‘product listing’ because I intend for the page to contain a list of products within the category, whereas a category listing would list any sub categories.
Clicking ‘Save’ gives a success message and the option to create another category. Repeat the process for each category.
