BannerMerchant: Displaying the Cart Summary
Once you have a few few categories and products added, you should be able to click through your products and categories to confirm that everything is working correctly. The only thing left to do is to give your users access to their cart so that they can view their order and then edit or finalize it.
This is done by displaying the cart summary on your page. There is already a default cart summary defined for you, and you can put it into any content block you like from the WYSIWYG editor. Because you're going to want it visible on every page, it's best to add it to a content block that will be displayed on every page.
If you go to your manage pages window in BannerOS, and click on a page title, like 'home' you can view and edit the blocks on that page. Blocks that appear on multiple pages will be modified on every page where they appear if you edit them. On the example site I'm working with, the header portion of the page contains a few blocks that display a logo and a company name. I think that below the company name is the best place to put the cart summary, so I'm going to click the upper right edit marker to make the change.
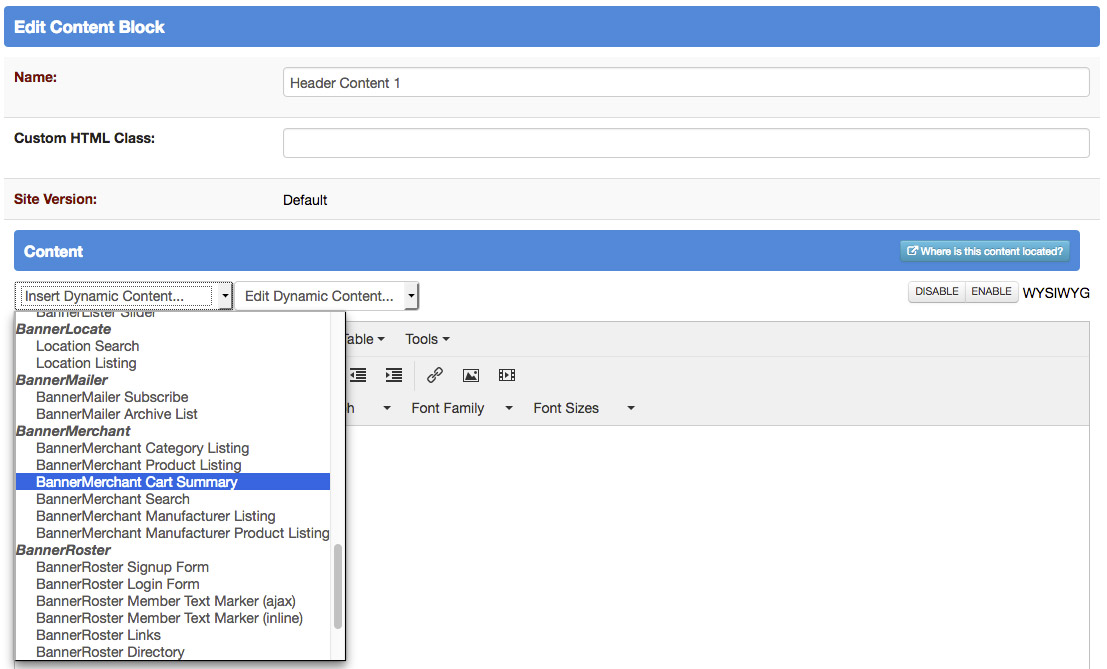
In the editor, create a new line by pressing enter, and then click the 'Insert Dynamic Content' drop down. Under the banner merchant header there is an option for 'BannerMerchant Cart Summary' selecting that and saving the result will give your users the ability to see their cart by adding a simple 'Shopping Cart:' label, with a number beside it to indicate the number of items currently in the cart.