BannerBilling: Create & Modify Statements
Statements are a summary of transactions for a given period, sent to the customer prior to their invoice so they know what to expect on the invoice after all payments and credits are applied. They can be scheduled to be auto generated, or manually generated for any given date range.
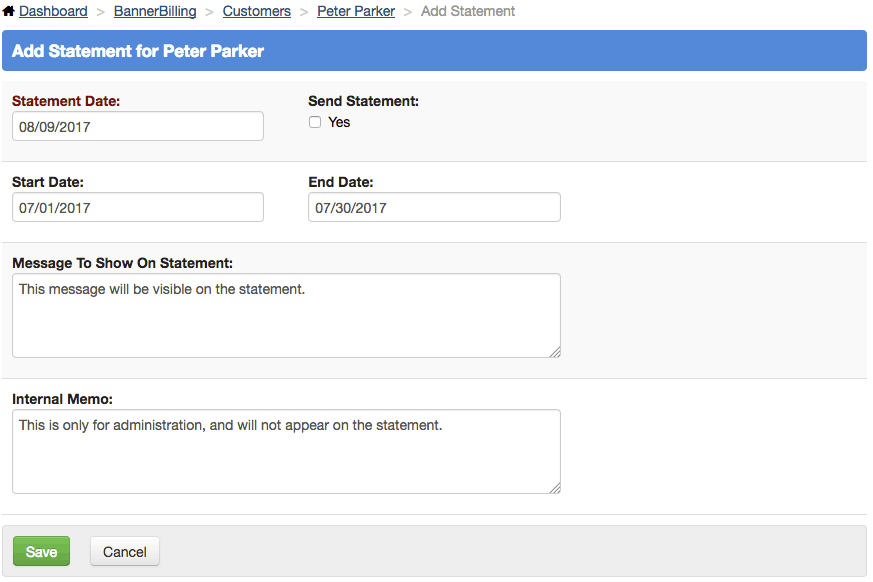
Choosing 'Statement' from the 'Add New' option on the customer overview will give you the options to specify the statement date range, and any internal or external comments.
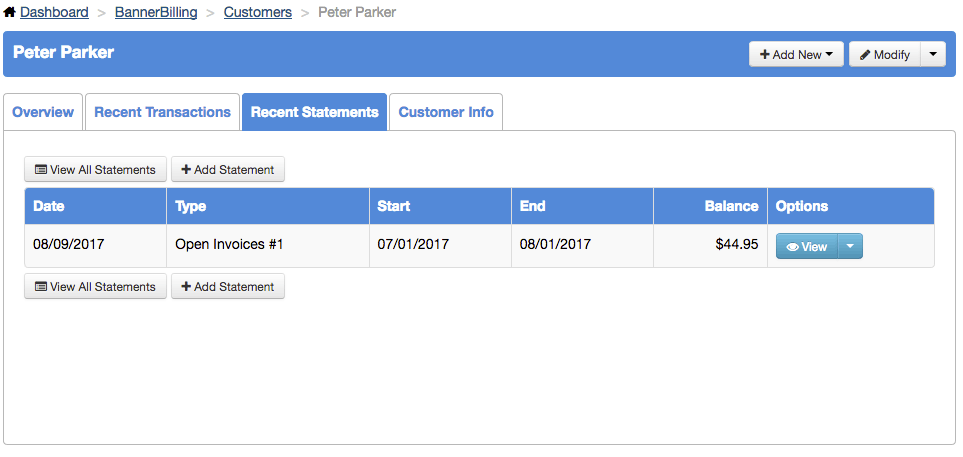
The recent statements tab on the customer overview will let you view or send statements generated automatically or manually. The down arrow next to the view button will let you view a printable version of the statement, or send it.
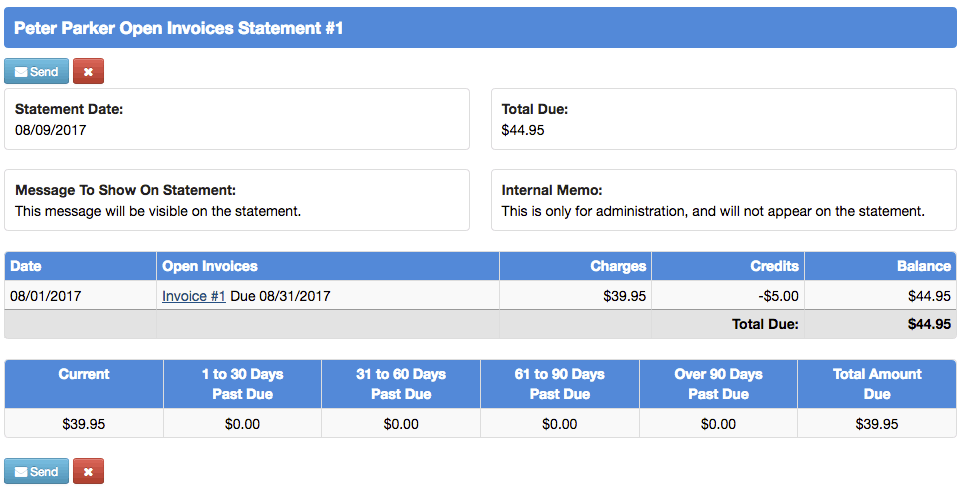
Clicking view will show you a summary of the statement; what invoices are included, and any charges carried over from previous statements. Here also you will have the ability to click send to send the statement.
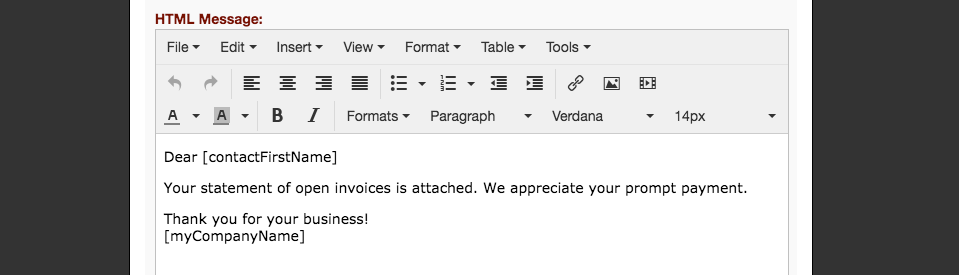
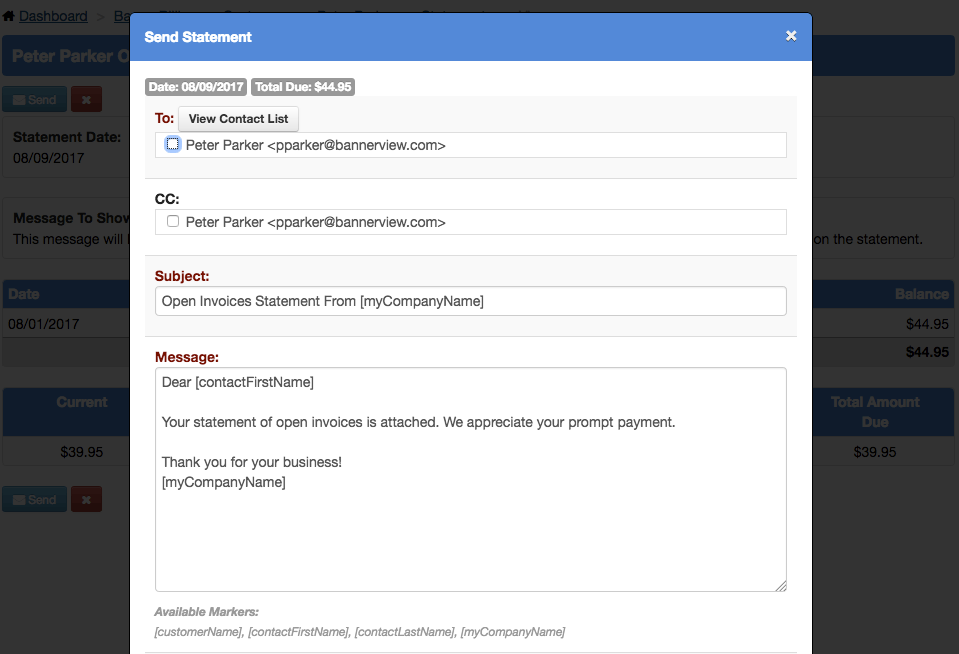
Clicking send from the overview or statement view will bring up the 'Send Statement' window. If you haven't configured your templates for statements and invoices, there will still be a default message populated, but you can click into any of the fields to update them. Personalize your message with the markers [customerName], [contactFirstName], [contactLastName], and [myCompanyName]. Contacts for the customer will be listed in the To and Cc lists to select who should receive the statement.
At the bottom of the window there is another box for an HTML version of the statement. It uses the same WYSIWYG editor as most of the edit pages in BannerOs and allows you to add media content, images, etc. It is a good idea to make sure your message is consistent in the text only and HTML view, because even a single customer may have different devices configured to accept text only or html messages.